
As promised, here is a second post about colouring faces, this time a more simplified version. If you find that the fully-blended method shown here makes your ink bleed a lot, or if your paper isn't the best, then this method might suit you better. This quicker method will cut out some of the blending steps, which will reduce the likelihood of your ink feathering over the line. We're using the same shades as before - E000, E00, E21 and R20. Rather than starting with your lightest shade and getting darker with each marker, we're going to apply the shading first and work up to the lightest colours. Usually, I wouldn't recommend using your darkest colour first as it is harder to blend a lighter colour into it, but with faces you are using such pale shades anyway that it won't make a difference.
Click on the photos for a bigger clearer view.
Click on the photos for a bigger clearer view.
So, take your darkest colour (in this case E21) and apply to the areas where you want a bit of shadow - under the fringe and down the sides of the face:

Then take your midtone (here I'm using E00), and colour over the shadows, taking the colour further into the face, using small circles to get an even coverage:
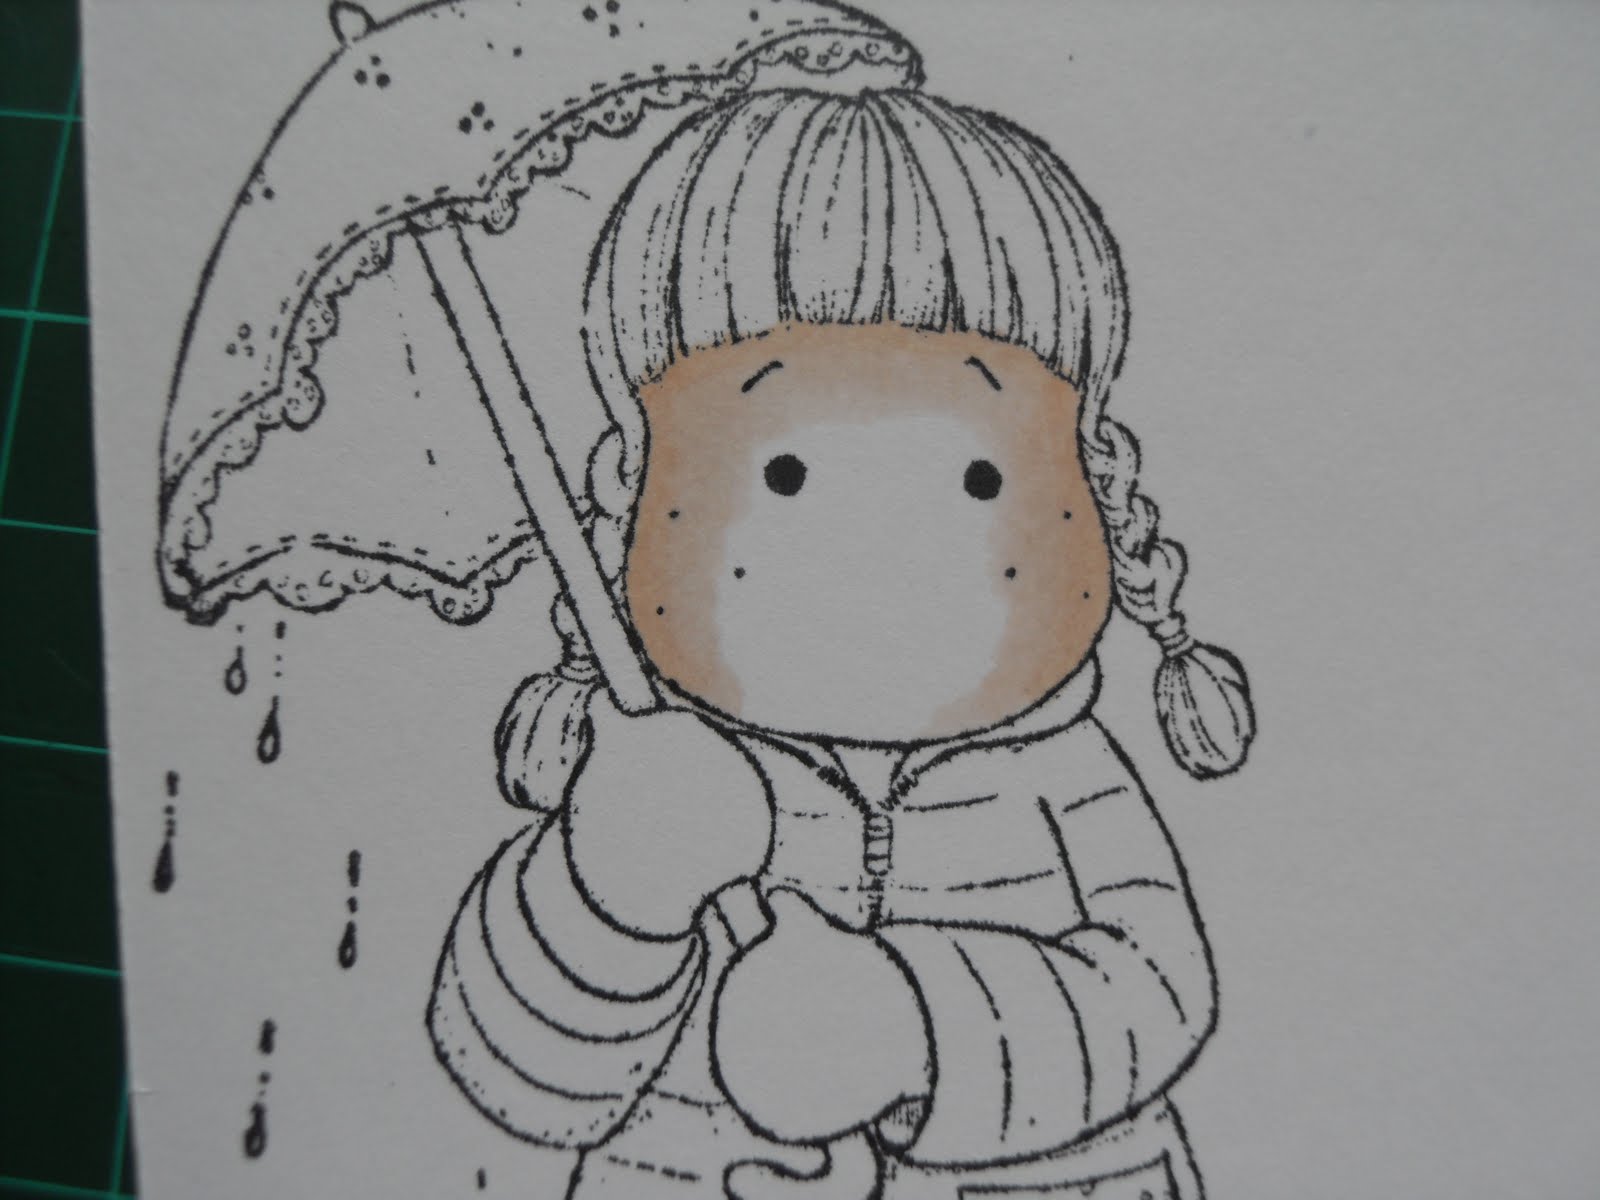
Next comes your palest shade, your highlight (in this case, E000) - go over the entire face, again colouring in small circles to get even coverage and to blend well with your previous shades:

While this ink is still wet, take your cheek colour (I'm using R20) and just lightly dab the point of the marker into the wet ink so that it feathers out a little:

Then, go back with your E00 and your E000 over the entire face but especially over the cheeks to feather that R20 out a little more to get a nice rosy glow rather than a hard line of pink colour (alternatively, you can just use the E000):

Finally, if you like, add 2 or 3 dots with a white gel pen on the cheeks to draw the eye and give that finished look:

So, why do the fully-blended method rather than this quicker one? Well, if you look at the last photo, which shows on the left the fully-blended Tilda face and on the right this quicker colouring method, you might see the difference. I think the fully-blended face has more depth due to the extra layers of colour I laid down. It comes down to preference - I like lots of colour and richer colours, even in skin tones, but I'd still use the quicker method if I wanted a paler complexion to my little character. You might feel differently and prefer a lighter coverage. So, I hope you find one of these methods useful in your colouring.


Happy colouring!
Carole x
2 comments:
Hi Carole, nice to see you on here....Hugs, Valerie
I can see what you mean, I will experiment. thanks so much for this. xx elvie
Post a Comment