Thursday 21 June 2012

Step-by-Step colouring of Tilda's curly hair


Hello lovely bloggers, I have a little colouring tute to share today, but first some nice news.....I am being featured today on a fabulous blog called Craft Corners in their 'Best of the Web' section. The blog is about all sorts of handicrafts, not just papercrafting, and it has some great ideas that I wouldn't mind trying myself. Nice if you want a browse round a new site sometime, it's the kind of place I like mooching around in when I can't sleep. There are a few other bloggers featured in this edition, too: a quilter, a mixed-media artist and a stitcher.

--------------------------------------

I've been colouring again. My good friend, the lovely Chrissy, sent me a Tilda image and asked how I would colour her very curly hair. I had no idea how to and I put it on the back burner of my mind to think over......for about a year or two! Anyway, in the mood to play recently, I found the image she sent me and decided to sit down and see if I could do something with it at last. I promised her I'd take some step-by-step photos and here they are.

I used this image recently to make a gift box...you can see the blog post about this box by clicking HERE.

This Tilda looks as though she has African American hair, or at least very very tight curls, so my usual hair techniques would not work here. This is how I planned and coloured the image.


Such tightly curly hair is a mass of darkness, which I decided I'd colour using E47 as my main colour with E49 as shadows, but to begin I needed to define some curls - I decided to colour the curls with a lighter edge to define them from the rest of her hair.


Step 1
I began by mapping out some curls by using a lighter-coloured marker - I'm guessing and feeling my way at this point so if I make a mistake it won't be such a big deal because I'll be coming in with a darker colour soon. The drawing of the hair is made up of lots of curves, and I'll be using these as the curls. Leaving the outer edge of the curves uncoloured, I laid down some E35 in all the areas that are going to be coloured darker later:

Mapping out with a lighter marker

--------------------------------------


Step 2
When I'm happy with where the curls are, so I go in with the colour I want her hair to be: E47. I put this ink in exactly the same places where I mapped out my trial colouring, but if you are more confident you could miss out the mapping stage and go straight in with your main hair colour:

Laying down main colour

--------------------------------------

Step 3
Next, I take my deeper hair colour that I am going to use for shadows (E49), and I add some to small parts of the image: round the bows and on the outside of the curves within the hair. This will give some depth to the image and accentuate the curls:
Adding some shadow areas

--------------------------------------


Step 4
Then I go back in with my main colour (E47) and blend in the shadows:
Blending the shadows

You can see that I did the 2 sides of her hair in different ways: on the left side I used the E47 minimally to blend in the shadow areas, and on the right side I actually coloured over the whole of the E47 area. At this point, I didn't know which side I preferred, remember I'm working this out as I go along.

--------------------------------------

Step 5
OK, so after this I want to add some colour to the curls themselves, so I use the paler colour E35 on the white areas only, I didn't blend in with the darker colour as I didn't want the highlight to get lost at this point:
Giving the curls some colour

--------------------------------------

Step 6
Now, at this point I switched to a dotted stroke for 2 reasons: as the image is now quite dark, it's harder to be precise about where the dark marker tip lands (for me anyway, maybe my eyesight isn't so great but I can't distinguish the end of a dark marker tip against dark colouring) so a dot is safer.....less ink comes out and less chance of messing up. PLUS dotted strokes add to the textured feel of the hair.

So, I dot some of the darkest marker (E49) into the shadows again to deepen and extend them:
Dotting to add in and extend the shadows

--------------------------------------


Step 7
And then I dot some of the main (E47) colour around to blend the dark dots and add more colour:
More dots to blend

--------------------------------------

Step 8
I'm not happy with the curls - there is too much E35 showing and I want to reduce the size of the highlighted areas. I take another colour, E44, and dot this around, extending into the highlight areas to make them smaller:
Reducing the highlights with a shade slightly lighter than
the main hair colour

--------------------------------------

Step 9
I could have stopped at this point as I'm happy enough with it. But I decided to take my E44 marker and again added some dots over and around the curls to tone them down a little, and you can see the result of this in the finished image below. The hair is still warmer because of the E35, but gives more the effect I was hoping for.

Here is the finished image:


Hope this was of some use. Please let me know if you use it - I'd love to come and see your work.

Happy colouring!


Saturday 16 June 2012

Needed a little Tilda love

Hi everyone, I hope the gloomy UK weather isn't getting you down, and for those not in the UK I am sure that you have better weather than here!. Mind you, the rain has really made the gardens lush and green, which is so very beautiful.

I have a new project to share today which you can see HERE. Because I know that not everyone likes Magnolia images, I have made a new blog to indulge my love of all things Tilda, and will be putting my Tilda projects there from now on. Here's a little peak:
The photos are not great quality because my trusty camera has given up the ghost, so they were taken using my phone. Which means I can't blog any more till I get a new camera, waaaaaail!

Have a good weekend, all.

Monday 11 June 2012

Colouring Challenge: non-blended hair


Hi everyone!  Hope you all had a good weekend and that the week ahead has only nice things in store for us. Thanks so much for the lovely comments for my last card, you make my day you really do.

News

It's all change at Make It Colourful. The fortnightly challenges have now ended BUT the colour addicts still love a challenge so we've all moved over to the Make It Crafty store blog and have become Colouring Inspiration design team members. We'll be choosing our own colouring challenges from a list that Zoe has given us, and as we all post on the blog on different days during the month there is something new to see and hopefully be inspired by every couple of days. Look for us in the Colouring Inspiration section.

Also on the store blog, you'll find inspiration for using Make It Crafty projects in the Design Team Inspiration section, and lots of colouring and craft tutorials in the Techniques section. So something new to see every day.


My card

My card today is my first project in my new role, and it is hopefully OK to blog as it should have arrived at it's destination by now (wink!).  I chose Zoe’s challenge of Hair With Fine Detail, i.e. no blending, and I used Copic markers with a little pencil overshading in parts. The hair I did with Copics only.

The digi image I chose to colour is Ginger House Wife and it doesn’t have a lot of fine detail in the hair, so it can be coloured fairly quickly without blending. I used short, light feather strokes with just the very end of the tip of my copic markers to achieve this layered look. The shades I used were: Y17, YR23, YR27, E37, and E19. Y17 is the colour that I wanted my hightlights to be – the parts where the light catches the hair and we see a shine. So I laid down a base layer of this colour first. Then I took the next colour (YR23) and made feathered strokes from the hairline towards the highlight and from the ends/outside of the hair towards the highlight, then with the next darkest shade I went over the same areas but with slightly shorter strokes so that the lighter-coloured layer underneath still showed through. To make sure that the inks didn’t blend I let each layer dry before putting the next colour on, just to be sure that I complied with the challenge!

Ginger was merged with another Make It Crafty image, Home Sweet Home. I think they go well together, don't you?


Tip: Get the stroke right

When making these feather strokes, practice using only the very end of the tip, keeping your stroke light – you are hardly touching the paper at all really. At the end of the stroke, lift the marker upwards so that the marks on the paper taper off to a point. This gives finer strokes with a tapered end so that you can more easily achieve the effect of strands of hair and texuture with strokes that are defined and not smudged together. This is the sort of line you are aiming for:

You can see how the copic marker brush tip makes a much finer tapered point than does the promarker regular tip, I don't have a fine promarker tip to compare (sorry).

If you're going for defined layers, let your ink dry before putting the next colour on - you can see the effect of feathering onto wet and dry inks:

The wet ink on the left causes the strokes to blur into each other, whereas the dry ink on the right makes the strokes much crisper.


Marker Recipe:

Hair: Y17, YR23, YR27, E37, E19
Skin: E00, E01, E11, R20, R22
Dress & Shoes: R32, R35, R37, R39
Stair carpet: YG61, YG63, YG67

I kept the card fairly simple as the coloured image is quite large, so just a couple of sheets of Papermania paper, some gold mirri card and a Prima flower were enough.


I'd like to enter this in these challenges:

Bunny Zoe's Crafts - Girls Girls Girls
Crafty Ann's - It's a Girl Thing
Oldie But A Goodie - Anything Goes (my papers are a few years old)
Papertake Weekly - Anything Goes
Stampin Sisters In Christ - option 2) Just an image on your card (no sentiment)
Touch Twin Challenges - Getting Hairy

Thanks for dropping by today and for any comments you'd like to leave. Have a good day and happy crafting!

Thursday 7 June 2012

Tags or Tickets at Sundays With Crissy

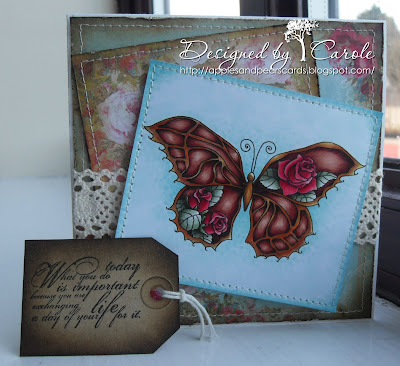
Hello everyone, how are you all? I'm here today with a card for our challenge at Sundays With Crissy. The theme this month is Tags or Tickets, so if your project has either of these on it, or if your project IS a tag or a ticket then it fits the bill perfectly. I've used a tag in my project which is where I stamped my sentiment. 

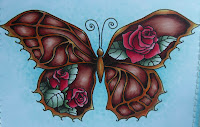
This was another chance for me to use this gorgeous image by Crissy, Rose Butterfly. I used it last month too in a different colour scheme, but it's too nice an image not to give it another outing. 


With the tag tucked in place

I wanted to create a Shabby Chic look, so I took these gorgeous papers by Prima and aged them by inking and distressed them round the edges, and added some handstitching. The image was coloured in copics and also handstitched. The tag is one I made some time ago for my DT project for Dream Valley Challenges which you can see HERE. The sentiment is by Tim Holtz and is stamped onto the tag.....it reads: "What you do today is important because you are exchanging a day of your life for it". The tag was then tucked behind the sentiment and can be pulled out.

The tag taken out - you can see the sentiment now
I'd like to enter this card in these challenges:
Bunny Zoe's Crafts - Anything Goes
Come And Get It Challenges - Flowers and Butterflies
Crafts & Me - Lace
Crafty Cardmakers - Distress It
Papermakeup Stamps - Tic Tac Toe
Papertake Weekly - Anything Goes
Ribbon Girl - Use ribbon or lace
Southern Girls - Things With Wings
Whimsy Inspiration - Things With Wings


I hope you'll come along and show us your projects with tags or tickets this month. You have till the end of the month to enter and could win your choice of some fabulous digi images. Happy crafting!

Friday 1 June 2012

We're off to Hollywood!

Hi everyone - today I've got a card to show that I made for our latest blog hop at Make It Crafty, for which we've teamed up with Simply Betty Stamps. Details about the hop follow, and my card is further down my post. The hop is for a release of some fun images that can be mixed and matched to make great scenes, and I've used a couple of them in my card. Here's a little sneaky peak before the hop write up:


 Make it Crafty and Simply Betty Stamps are really excited to be bringing you the combined Hollywood Release!
Simply Betty Stamps has a range of characters from Betty Monroe, through to Action Chris the movie director!!
Make it Crafty has a range of background scenes perfect to switch and match with your famous characters!!

MiC & SBS Guess that Movie

Of course we are going to have heaps of fun with this theme and June 1st & June 2nd we will be showcasing our stuff and then June 3rd we're bringing you a fun guessing game... Will you be able to guess the movie??  We'll be giving you some clues to help!!

Join us for the two inspiration days and leave a comment along the way for your chance to win a selection of new images.

There will be FOUR winners each day receiving a surprise character with matching background digi stamps.
Then on June 3rd, guess 6 out of 12 movies correctly and you will have a chance to win:  

Grand Prize

A DVD Movie of your choice
PLUS the whole collection of MiC & SBS digi stamp Hollywood release images.

 
Second Prize
The whole collection of MiC & SBS digi stamp Hollywood release!


Can't wait?!!

But we know some of you just can't wait so both Betty and Zoe are offering you 25% off
their Hollywood collections between June 1st and June 3rd!


We hope you have lots of fun with us this weekend!!!

You should have arrived here from Lelia, but in case you want to go from the beginning, the hop order is included below.


I made a shadow box card using Simply Betty's Little Usher Miller and Make It Crafty's Watching Movies. It's quite a big colouring as the card is A5 sized, and I made some filmstrip ribbons of paper to cover the frame. I've left it pretty simple, it was mainly about the images and the colouring.

Image is sunk about half an inch into the card

Here are the other stops in the hop:
Carole (you are here!)

Hope you like my card, and don't forget to leave a comment if you're following the blog hop.

Happy crafting!